
Roast Pork Belly Recipe
I love pork. I love eating it, thinking about it and making it. It tickles me to no end that my daughter was born in the Chinese Lunar New Year of the Pig too. So today I’ll be sharing how I prepare Roast Pork Belly. No exposition here will do justice to the smells that waft around my house while it's roasting. Yet it’s so easy to make and it’s mostly hands off. This recipe is best for weekends or when working at home. The key ingredients to this recipe aside from the pork belly are time and love: love for yourself, the pig and/or whomever you’re breaking the figurative bread with. Keep in mind you are the only one that can make this last ingredient happen.
Part of what makes pork belly so special in my house is the crackling. Fresh crackling is the only kind my husband will eat. No pork rinds for my guy... which means more for me and Grace. Yes to that! The essentials to good crackling are starting with flat, dry skin and slow roasting it to further dry it out in preparation of high heat in the end. This means when you get the pork belly from your local butcher ask them to leave the skin on, unscored, unrolled and flat. Once it gets rolled there’s no ironing it out. If you love crackling as much as I do and I truly do love crackling, this bit is super helpful to note.
Pre-prep:
It’s best to start this the day before you plan on roasting it. At dinner when you’re wondering what you’ll be doing for dinner tomorrow night it would be a good time to take the ideally flat and unwrinkled skinned pork belly, put it on a plate, skin side up and in the fridge uncovered so the skin can dry out overnight. If you forget this part, it's not the worst thing in the world. Pat dry with towels as best as you can.
Preparation:
The next day, around lunch time, start prepping so it’s ready in time for dinner. Preheat the oven to 285F. Put 2-3 layers of foil on your baking sheet. A layer for easy clean up and layers to wrap the pork. In this case I’m using a half sheet for a nearly 3 lb pork belly. I love/live on leftovers. A 1 lb pork belly is plenty for 2 people with good appetites, served with sides and is small enough it can be done in a toaster oven.
Roasting time varies depending on the weight. Slow roasting meat is pretty forgiving so I estimate about 35-40 minutes roasting time per half pound of pork belly.
Prep the pork belly with oil and season with salt. I’m a little more liberal with the oil on the meat but put just enough oil on the skin for it to shine. Unabashedly sprinkle salt on all sides of the belly. Lay the pork on the foil. I like using two of the 3 layers of foil to create a bed for the pork belly to insulate the meat from drying out and then so it can braise in its own juices.
Because of shrinkage during roasting, about 65-75% of the way through roasting time I remove it from the oven to tighten the bed for the pork belly to cover up the sides again and raise the liquid level up the sides of the pork while leaving the skin DRY!!! This is so important for developing the crackling in the last step of the process. Have I mentioned I love crackling? So, after putting it in the oven at 285F for 2.5 hours I remove it to tighten the foil bed since the meat has shrunk. Then I put it back in for another hour until the pork gets tender enough to slice but not so much it falls apart. I make pulled pork with pork shoulder not pork belly. This precious belly needs to be able to stand up to whatever else can be done with it. (Reference Suggestion #2 below)

After 3.5 hours at 285F remove the pork from the oven and crank the oven up to 475-500F. The hotter the oven the faster the crackling will develop but the smaller the window you have before the crackling might burn. Remove the pork in its bed from the tray. Put a rack on the tray. Very carefully remove the pork belly from its bed and place onto the rack. I say very carefully because if you accidentally separate the skin from the pork meat like I recently did the crackling buckles during the high heat and doesn’t crackle evenly. The rack is optional but it lets any leftover fat drip off during the final step. Using balls of foil placed under the pork belly, level out the skin/top layer of the belly so it gets blasted with the oven heat evenly. Put the pork back into the oven. After 10-15 minutes rotate the roasting pan 180 degrees and check on crackling development. Complete crackling development can take anywhere from 20-30 minutes. If areas are browning much faster than other areas then cover those parts with a patch of foil.
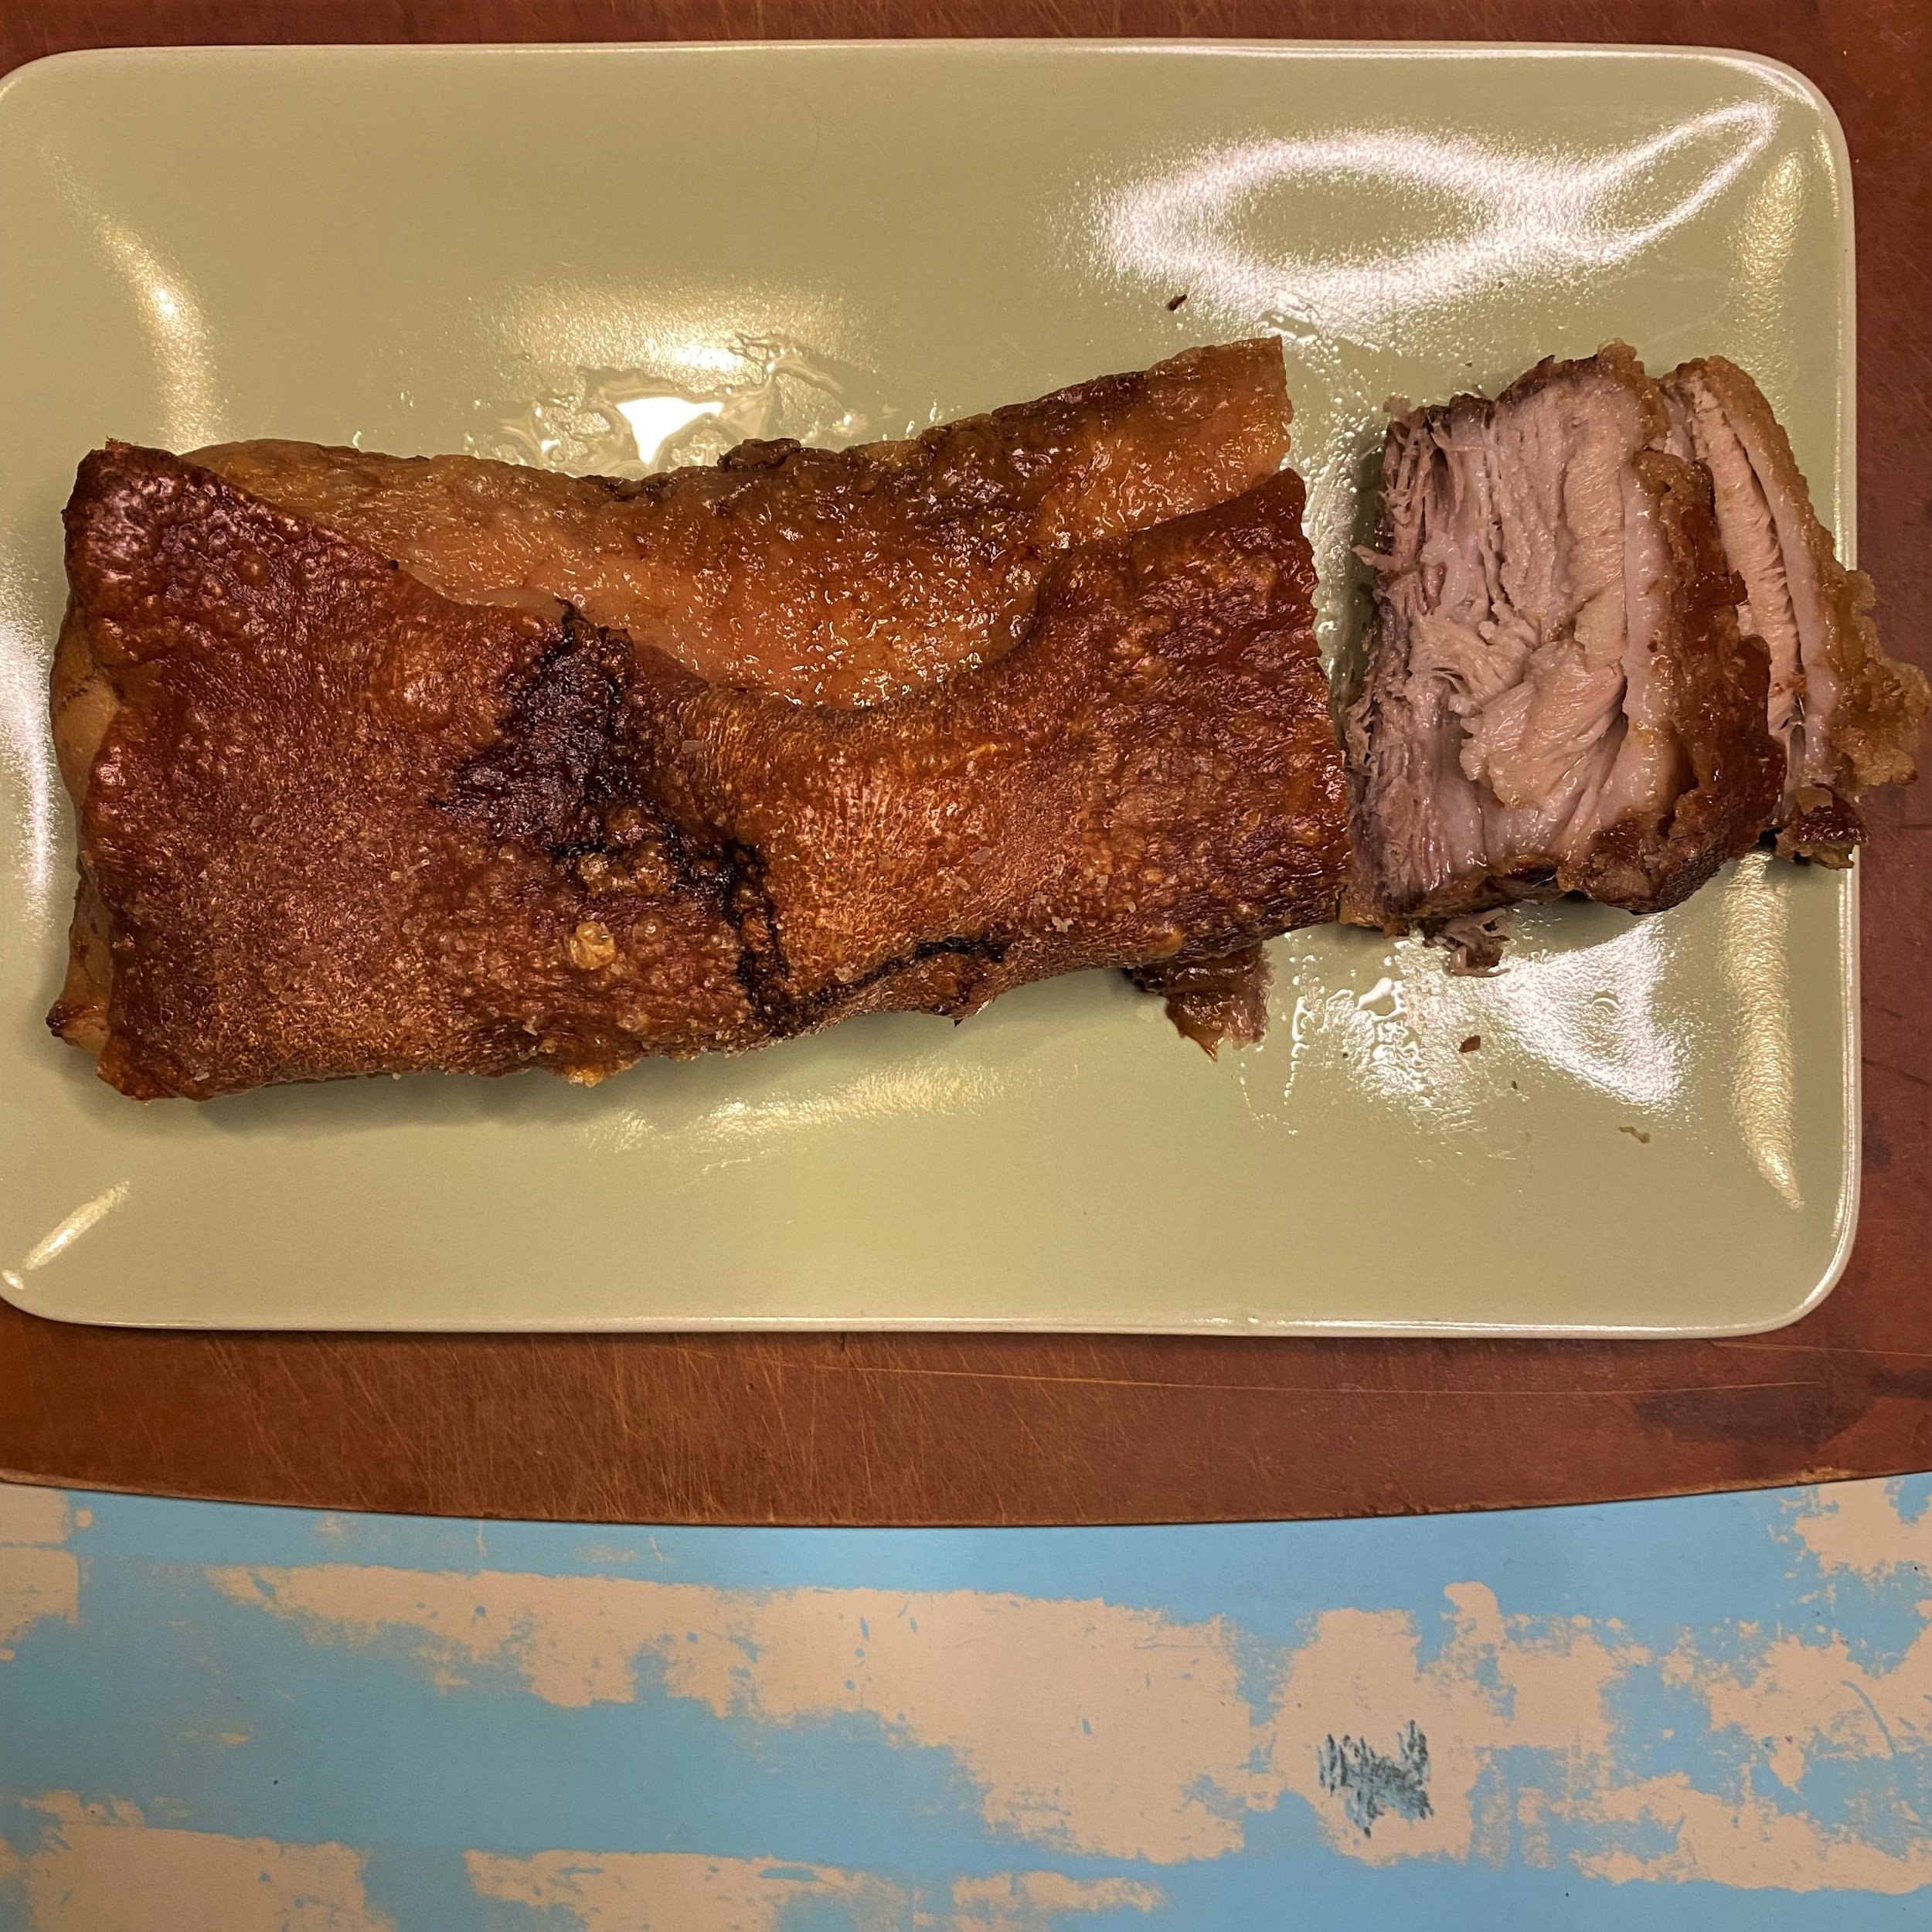
When crackling looks just about done, remove the pork belly from the oven. Let rest for at least 10 minutes or 20 minutes if you can stand it, before slicing with a serrated knife and serving. Serve with lots of vegetables to counterbalance all this meaty goodness.
Continue reading below for succinct, step-by-step instructions.
Suggestion #1:
For the love of God save the rendered fat! Using a sieve over a glass jar, save the rendered pork fat to use for seasoning your cast iron, sautéing vegetables or wherever else high temperature oil is required. Store covered in the fridge. If for any reason you don’t find you have a use for this incredibly economical source of fat please bring it to the office for me when you come for your next session. It would so make my day!!!
Suggestion #2:
Any leftovers can be stored in the fridge to be used within a few days. I suggest storing the crackling separately, assuming there is leftover crackling, to reduce moisture exposure so it stays crisp. Once the pork belly is cold, it holds up better to slicing. After slicing, I like to brown it in a medium hot cast iron to dress my ramen or as a side to my vegetables. After slicing, it can also be marinated in whatever your heart desires before reheating in a hot pan.
Suggestion #3:
Something I haven’t tried yet but would like to next time I make this is to put unpeeled garlic cloves under the pork belly in its foil bed to infuse the meat with the garlic or to make really yummy garlicky fat.
If you try this recipe let me know how it goes! Happy Roasting!

Recipe inspired by Nagi on Recipetineats.com
Drying: 8-12 hours
Hands on prep: less than 10 min
Cook: 4 hours
Serves: 6 or one hungry Mrs. Bob and her Mini Me.
Ingredients:
3 lb pork belly with skin flat and unscored from your local butcher
Note: if using a different weight, reference Preparation section above for time adjustment
1-2 t of olive oil
1-2 t of kosher salt (a little more of Diamond Crystal or a little less of Morton)
Tools:
Foil
Roasting pan
Rack to fit in roasting pan (optional)
Instructions:
Dry the skin: The day before roasting, put pork belly on a plate, skin side up and in the fridge uncovered so the skin can dry out overnight. If you forget this part, it's not the worst thing in the world. Pat dry with towels as best as you can.
Preheat oven to 285F making sure the oven rack is in the middle.
Loosely cover roasting pan with 2-3 layers of foil.
Dress the pork belly with oil and season with salt. Using more oil on the meat and just enough oil on the skin for it to shine. Unabashedly sprinkle all the salt on all sides of the belly.
Lay pork on foil, skin side up. Tuck 1-2 layers of foil up around the sides and fold the corners creating an open box. Wrap the leftover layer(s) of foil around the edges of the roasting pan to secure it.
Place on middle rack in oven. Total roast time is 3.5 hours.
Roast for 2.5 hours. Remove and tighten foil bed to the sides of the pork belly.
Return to oven and roast for 1 hour.
Remove pork from the oven and increase the heat to 475F.
Remove “the pork in the foil bed” from the roasting pan. Optional: place rack on roasting pan to let the pork drip off any excess fat while crackling develops.
Very carefully “remove pork belly” from the foil bed and place on the rack on the roasting pan.
Level the top layer: Using little balls of foil underneath the belly to prop it up, level out the top of the pork belly so the skin is as horizontal as possible so it has an even exposure to the heating elements in the oven.
Place back in oven. After 10-15 minutes rotate the roasting pan 180 degrees and check on crackling development. Complete crackling development can take anywhere from 20-30 minutes. Optional: if areas are browning much faster than other areas then cover those parts with a patch of foil.
Remove pork from oven and let rest for 10-20 minutes.
Using a serrated knife, slice a little less than an inch thick. Serve with lots of vegetables and enjoy!